

 This is me and JP!!!!!!

 Here are some pictures of Landus Bennett of Watson Spring, out in Farmington. We drove out there today to see some cedar for use in building our bathtub. There is a fallen tree down the hill that they are going to mill to specs for us, and I will pick the wood up a few days. In the mean time I bought a piece of cherry to give to my friend Tim, a wood turner, who is going to make us a set of plates and bowls. Wooden kitchen wear seems like the most light-weight and non-breakable option for a home where weight is an issue.
 a lamp made from apple wood that Landus is working on, and their super mellow and sweet shop dog Ben!
 And last but not least: here is Scott using the metal detector they sue to find nails and such in wood they re-claim from old barns and the like.

 HINGES for the back utility closet doors!! I have been wanting to build these two doors, but waiting to find the right hinges!!
 This I will use to make the form for the hole in the bottom of the bath tub. Once I get the wood frame built I will cut a hole, fit this into it and then wrap the fiberglass resin embedded cloth down into the hole and out to accept the plumbing.
 This will mount to the underside of the TRLR and provide more ventilation for the solar batteries.
 While I have been working away for 2 months now on the red oak portions of the roof trusses I have realized something about the order of operations with regards to construction. While I have been really frustrated at how long and cumbersome wood working can be (especially when you are working primarily with chisels, a back saw and sand paper...) I am kind of glad because it has given me time to think through some other design issues and start finding the supplies and where-with-all for building the water filtration system. The gist is that once the roof trusses go up the oak will need to be protected by the roofing and siding, but once I put the siding up it will be more difficult to install some parts of the water system (like the tanks in the sub floor). Also, I will need to build the intake and out-take ports into the siding as I go.. and to do that, and choose the right hardware, etc. so that all the pipes and tubes fit together, I need to know what supplies I will be using, from start to finish, even before I install the final system. That has brought the question to my attention " How can it be that I could pour "contaminated water" from a river or creek even, into the trailer, and have it come out clean and even drinkable?! Filters and UV light.
 and it will either go to one of two 30 gallon tanks like this ( from DM Plastics in Alberta)
 There will be one tank for the bathroom and one tank for the washing machine. At the point of use in the bathroom there will be other filters like these:
 used in conjunction with a point of use hot water heater, so that water used for bathing will be filtered twice and water used for washing clothes will be filtered once. Then, after it drains from either the bathroom sink, bathtub/shower, or washing machine it will enter a system that is designed to clean the water to make it drinkable.
 These are UV light tubes that people use in koi pond, and it will be connected to a series of filters of a reverse osmosis system for removal of particles and heavy metals:
 and then into a 60 gallon tank like this from DM Plastics.ca
 This tank will also be receiving rain water from gutters that will be fed into the UV/filtration system.... and the hope is that once water has passed through the trailer and comes out the spigot at the back it could be used to refill the water jugs, taken to the front of the trailer and used for cooking and washing dishes... maybe even shared with neighbors if we are in someplace that doesn't have clean drinking water. I am saving up for the water tanks right now.


 Here is the bath tub Dan built for two!
 the quarter sawn grain of the wood is really starting to come out with the sanding! with a few layers of tung oil it will be lustrous and shiny!

 "The Grizzly" home of "wally the wandering sanding belt"
 Brent Swanson
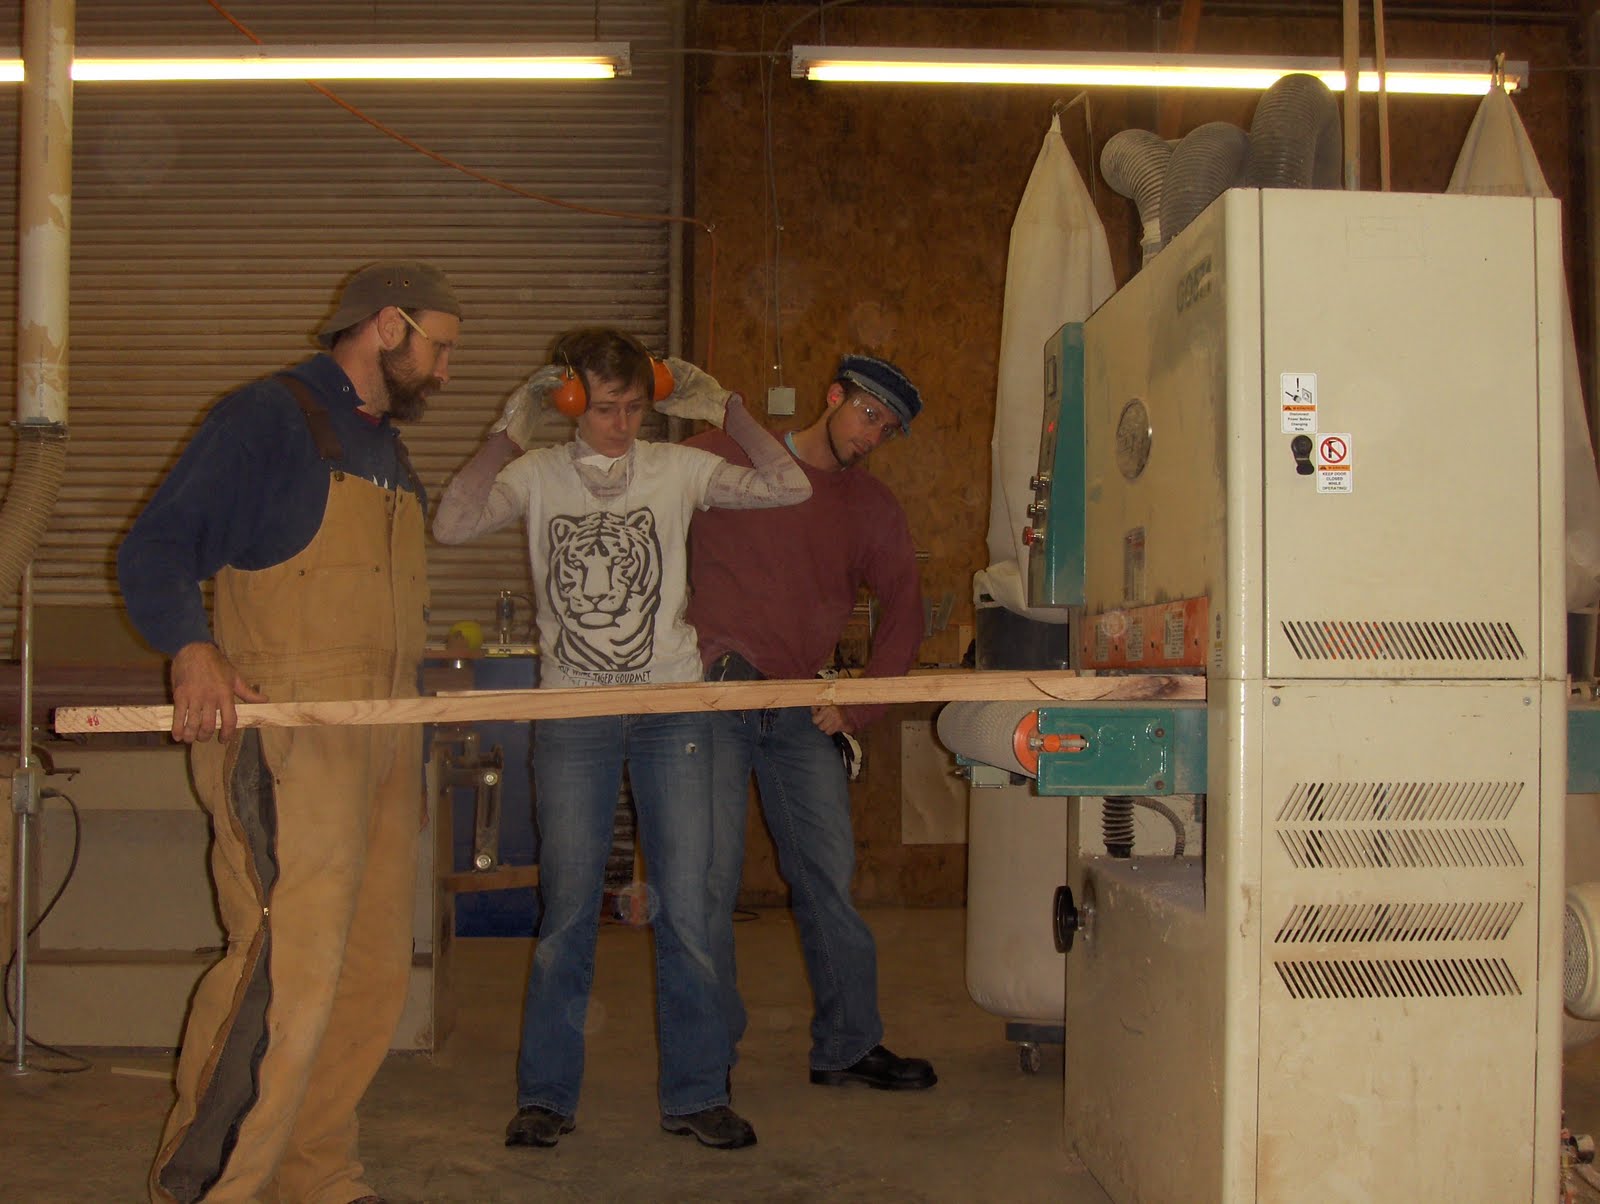 Feeding the grizzly
 I went out to visit Brent Swanson of Normaltown Woodworks out in Winterville the other day, and showed him everything I had done here to fore. He said I can work with what I've got, and offered some next steps to take to add structural integrity to my joints, as well as covering up my shoddy fitting. Today I finished cutting all the mortises, and by tomorrow I will have all the joints glued and ready to sand, which he offered to let me do in his big sander. Thanks Brent!
 this is the marked for the mortise I need to work, it's 3 5/8th" deep.. and an acute angle, the X is the material that need to be removed, down to the pencil line you see running across the board.
 It was hard for me to hold the line when I cut the tenons with the radial arm saw, so the other boards don't fit snuggly.
 cutting the tenons along the bias of the grain of a hard wood, sometimes the saw bit into the wood, and I wasn't strong enough to hold it, so big chunks were torn away, on the edges of the tenons.. I don't know if thse can be filled with epoxy or not.
 when cutting the mortises, I have started by removing wood with the circular saw, and then a chisel, but my cuts are quite un-even, so the fit inside the joint is not so good.
 the joints are angled, and it seems that my angels are too deep on one side, or another, usually both! and/or, since the inside of the mortise is uneven the tenon piece doesn't fit well, or fit all the way down into the joint....so there is space @ the bottom
 more gouges where I lost control of the wod


 The little wall is built with 20 gauge material and a light gauge non structural c-track that is 1 5/8th inches wide, so i could turn the studs sideways and save a little bit of room.
 This is a good shot of the place where the floor and the walls meet, the studs are fastened to the top of the wall with angle clips.
 another good shot of the assembly from the bottom...
 Scott is stoked