
Saturday, February 23, 2013
Bathroom floor
Filters and tanks: Plumbing plans
http://www.sawyer.com/

This is one of the biological filters I want to install in the lines that run from the gutters, and also as a drinking water filter from the main tank. It is called a Sawyer Water Filter, and was first developed as a dialysis filter, and then adapted for back country enthusiasts. It has permanent filter elements and can be easily quick-released from the lines and back washed.. and it removes particles
 THE TANKS FINALLY ARRIVED!

 I
started out laying everything out like it will be, approximately. I
still need to build the two accumulator tanks (see this link: http://www.modmyrv.com/2009/06/10/rv-diy-water-accumulator....except I am going to use copper instead of PVC.)
I
started out laying everything out like it will be, approximately. I
still need to build the two accumulator tanks (see this link: http://www.modmyrv.com/2009/06/10/rv-diy-water-accumulator....except I am going to use copper instead of PVC.)
 This is the kitchen set up, sans illustration.
 This is the main set-up, sans illustration
 and this is the main set up with everything explained!

This is one of the biological filters I want to install in the lines that run from the gutters, and also as a drinking water filter from the main tank. It is called a Sawyer Water Filter, and was first developed as a dialysis filter, and then adapted for back country enthusiasts. It has permanent filter elements and can be easily quick-released from the lines and back washed.. and it removes particles
,
bacteria and cysts down to 0.1 & 0.02 micron filtration. This I use
to filter my drinking water now, seeing as I haul it all on my bike,
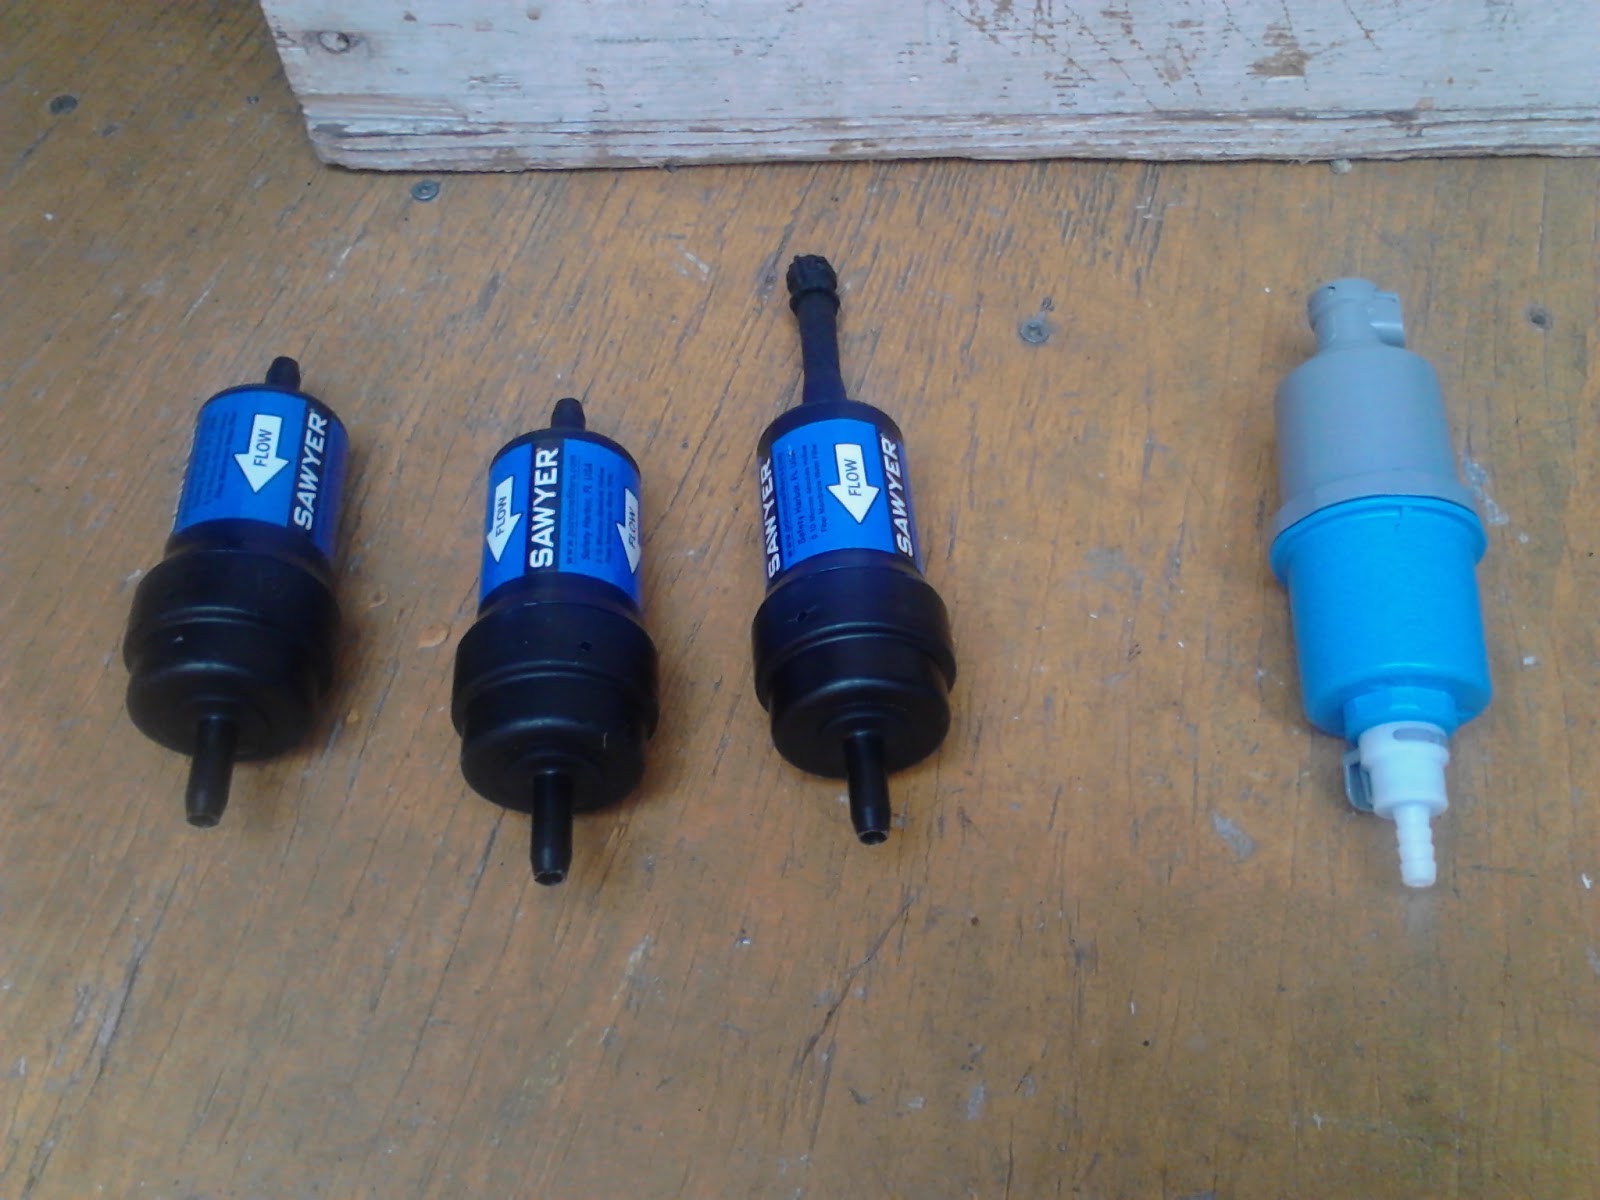
gotten from various spigots around town.. There is no telling. These are the filters: three sawyer filters for the rain water lines, and one for drinking water. www.business-connect.com
 one way in, one way out
 inside the filter. from www.usplastics.com
 three
washable part filters... stacks of rings, around a mesh cylinder, with a
dense pad of slightly squishy plastic on top. They will filter for
complete clarity. One I am going to pack with activated charcoal and use
it for drinking water purification.
three
washable part filters... stacks of rings, around a mesh cylinder, with a
dense pad of slightly squishy plastic on top. They will filter for
complete clarity. One I am going to pack with activated charcoal and use
it for drinking water purification.
 three sawyer filters for the rain water lines, and one for drinking water. www.business-connect.com
 one way in, one way out
 inside the filter. from www.usplastics.com
 three
washable part filters... stacks of rings, around a mesh cylinder, with a
dense pad of slightly squishy plastic on top. They will filter for
complete clarity. One I am going to pack with activated charcoal and use
it for drinking water purification.
three
washable part filters... stacks of rings, around a mesh cylinder, with a
dense pad of slightly squishy plastic on top. They will filter for
complete clarity. One I am going to pack with activated charcoal and use
it for drinking water purification. THE TANKS FINALLY ARRIVED!

 I
started out laying everything out like it will be, approximately. I
still need to build the two accumulator tanks (see this link: http://www.modmyrv.com/2009/06/10/rv-diy-water-accumulator....except I am going to use copper instead of PVC.)
I
started out laying everything out like it will be, approximately. I
still need to build the two accumulator tanks (see this link: http://www.modmyrv.com/2009/06/10/rv-diy-water-accumulator....except I am going to use copper instead of PVC.)  This is the kitchen set up, sans illustration.
 This is the main set-up, sans illustration
 and this is the main set up with everything explained!
Trimming out the basement
I am using corrugated plastic sheets from a sign shop to enclose the under side of the trailer. I have work to do building out the "basement". The four trays
visible will hold the batteries for the solar system, forward of that is
the area where the recess will be for the stabilizer jacks, and forward
of that , closest to the nose, is where the kitchen plumbing will be
installed. BTW: here is a link to a free book about how to design and
build off grid?RV plumbing systems: www.rvst.org/RVIA_Textbooks/Plumbing_Systems.pdf
 I got some sign board, corrugated plastic to install on the under-belly of the trailer.
 the extra material around the jack and the profile of the recess I need to build
 cutting away the area to build the jack recess.

I have built tents, one side of which has a vent in it to channel air to the battery compartment. As seen from the under-side.


 Trimming the jack wells in metal, and of course, CAULK! A good girl's gotta love some caulk!
 Here is the tread plate that will be the final exterior facing of the jack wells.
 Before the kitchen sink tank and other plumbing can go in, the basement has to be insulated and the support grating installed.
 I got some sign board, corrugated plastic to install on the under-belly of the trailer. the extra material around the jack and the profile of the recess I need to build cutting away the area to build the jack recess.
I have built tents, one side of which has a vent in it to channel air to the battery compartment. As seen from the under-side.

 Trimming the jack wells in metal, and of course, CAULK! A good girl's gotta love some caulk!
 Here is the tread plate that will be the final exterior facing of the jack wells.
 Before the kitchen sink tank and other plumbing can go in, the basement has to be insulated and the support grating installed.
Sunday, February 10, 2013
Home made accumulator tanks
This project come from this article I found online:
Copper to build the accumulator tanks


 Mr. Rusk agreed to teach me how to sweat copper pipe together, so we set everything up and got started.
 First step: pre-drilling the hole for the valves.
 It was easiest to put the pipe in the vice for sanding. Sand the two surfaces of the copper you want to join and then add a thin layer of flux to each clean and shiny surface. The heat the metal and when the temp is right to let the solder flow, feed it into the joint.

First joint to make was the cap to the pipe, then I installed the valves.


The cap to the end of the pipe, the 3" - 1" reducer to the end of the pipe, and then the 1" - 1/2" reducer to finish x 4 tanks.


Thanks for your help Mr. Rusk!
Subscribe to:
Posts (Atom)